CI/CD with Github Actions
This post is part of a series on Android Unity Package Development. If you’re interested in following along from the beginning, I recommend you start here
Automated Builds and Publishing with Github Actions⌗
In order to share the package with others, it would be nice to create an automated build and publishing pipeline. Github provides a CI\CD system called Actions which can be used to automate this process. Github Actions are composed of workflows, which can themselves be composed of other workflows and triggered through various means. The build and publish process for the Android Unity package will have four steps:
- Prepare versioning information
- Build Android plugin
- Publish package to NPM
- Tag the commit used for building
Each of these steps will be represented by a separate workflow, and all of the steps will be composed in a release workflow that is run for every push on the main branch.
Reusable Workflow Configuration⌗
Each of the workflows that make up the main workflows of the build pipeline share some common features. Each workflow can be configured with a name and a run-name to display in the Actions page of the Github repository. The run-name can use expressions to provide more context about an individual execution of the workflow. All of these workflows will configure the on parameter to use workflow_call, which indicates that these workflows will be invoked from another workflow.
name: Example Workflow
run-name: Running Example Workflow on ${{ github.actor }}
on: workflow_call
Versioning⌗
Semantic versioning is an important aspect of releasing a package. Luckily, the Github Tag Bump action can be used to compute new version values and tag commits. You’ll need to create a new workflow tag-version.yml using this action, which will be called both at the beginning of the main workflow and at the end of the main workflow. The first call will specify that the operation should be a dry run and will calculate the new version, while the second run will actually tag the commit. You could tag the commit at the first step of the main workflow, but this would still generate tags in the case of a failed build. Calculating the new version and tagging the commit look very similar, so the same workflow can be used for both operations with a boolean input parameter used to specify the behavior.
name: Tag New version

on:
  workflow_call:
    outputs:
      tagversion:
        description: "New tag for the build"
        value: ${{ jobs.tag.outputs.tagversion }}
    inputs:
      dryrun:
        description: "Whether or not to skip the git tag step"
        default: false
        required: false
        type: boolean

jobs:
  tag:
    runs-on: ubuntu-latest
    outputs:
      tagversion: ${{ steps.tagversion.outputs.new_tag }}
    steps:
      - uses: actions/checkout@v3
        with:
          ref: ${{ github.sha }}
          fetch-depth: 10
      - name: Tag new version
        id: tagversion
        uses: anothrNick/github-tag-action@1.61.0
        env:
          GITHUB_TOKEN: ${{ secrets.GITHUB_TOKEN }}
          WITH_V: true
          DRY_RUN: ${{ inputs.dryrun }}
This workflow checks out the current branch, and runs the tag action. If the dryrun input parameter is set to true, the workflow calculates the new version but does not tag the commit. By default, the tag action bumps the minor version number each time it is run. The GITHUB_TOKEN secret is automatically generated by Github. If a commit message since the last tagged version contains the string #major, #minor, #patch, or #none, the default behaviour will be overridden and the respective version bump will be executed.
Building the Android Plugin⌗
For the Android plugin, the workflow can make use of some pre-existing Android development images. Create a new workflow file called build-android.yml. This workflow will have one job, and it’ll be configured to use a container from the collection linked above.
name: Build Android Plugin
run-name: Building Android Plugin on ${{ github.actor }}
on: workflow_call

jobs:
  build:
    runs-on: ubuntu-latest
    container:
      image: docker://fabernovel/android:api-33-v1.7.0
Next, setup the job to checkout the source code using the checkout action and use a cache to improve Gradle build times.
    steps:
      - name: Checkout
        uses: actions/checkout@v3

      - name: Gradle cache
        uses: actions/cache@v3
        with:
          path: |
            /root/.gradle/caches
            /root/.gradle/wrapper
          key: ${{ runner.os }}-gradle-${{ hashFiles('**/*.gradle*', '**/gradle-wrapper.properties') }}
          restore-keys: |
            ${{ runner.os }}-gradle-
Now that the source code has been retrieved and the gradle cache is initialized, the plugin can be built. The next snippet makes the gradlew command executable and runs the assembleRelease gradle task. After the build is finished, the AAR file will be uploaded as an artifact so that it can be used in the publish workflow.
      - name: Build
        run: |
          cd ./android~
          chmod +x ./gradlew
          ./gradlew assembleRelease

      - name: Upload artifacts
        uses: actions/upload-artifact@v3
        with:
          name: android-plugin
          path: Plugins/Android/*.aar
Publishing to NPM⌗
The publish workflow is made relatively simple by using the Github-provided setup-node action. First, configure a new workflow named upload-package.yml. Note the inclusion of a required input for the package version.
name: Publish Package to NPM
on:
  workflow_call:
    inputs:
      version:
        required: true
        type: string
For the job, this workflow will checkout the source code, download the AAR artifact from the build-android workflow, and publish the package to NPM. Git tagging is suppressed because the tagging will be handled manually in the next workflow.
jobs:
  publish:
    runs-on: ubuntu-latest
    steps:
      - uses: actions/checkout@v3
      - uses: actions/download-artifact@v3
        with:
          name: android-plugin
          path: ./Plugins/Android/
      - uses: actions/setup-node@v3
        with:
          node-version: '16.x'
          registry-url: 'https://registry.npmjs.org/'
      - run: npm version --no-git-tag-version ${{ inputs.version }}
      - run: npm publish --access public
        env:
          NODE_AUTH_TOKEN: ${{ secrets.NPM_TOKEN }}
NPM Access Token⌗
You may have noticed that the job sets an environment variable based on a secret. If you want to publish to NPM, you’ll need an access token linked to your account, and this token will be passed to the workflow using Github secrets. To generate a new access token, navigate to your NPM account, click on your profile photo, and select Access Tokens. Click Generate New Token and select Granular Access Token.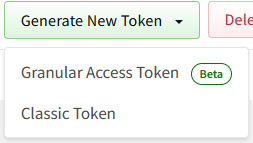
Fill out the sections for name and expiration date, and set the permissions to Read and Write. If you have previously published the package associated with this project, specify the package in the Select packages and scopes dropdown. Otherwise, choose All packages and click Generate token (it’s probably a good idea to replace this token with a properly scoped token once the package has been published once). Copy the token to the clipboard and navigate to the settings page on the Github repository for your package. In the navigation bar on the left, select Secrets and Variables -> Actions under the Security section.
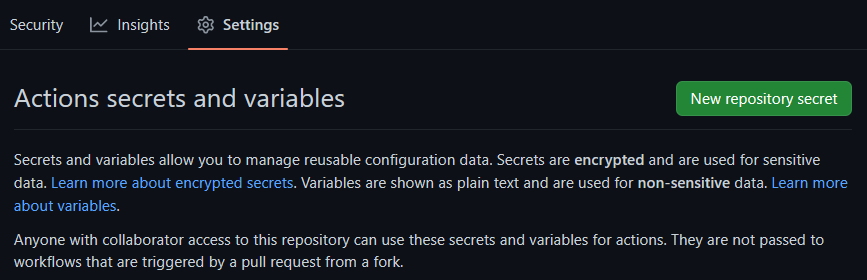
Click New Repository Secret, set the name to NPM_TOKEN, and paste the copied token into the Secret input field. After clicking Add Secret the secret will only be readable from within the Actions associated with this repository.
Putting It All Together⌗
With all of the individual components of the build pipeline ready, you can create the top-level workflow which will call the previously defined workflows. Create a release.yml workflow and define the workflow parameters. In this workflow, note that it will run on every push to the main branch, as opposed to being called by another workflow.
name: Release
run-name: Building release package
on:
  push:
    branches:
      - main
Each of the jobs in this workflow will use the uses key to specify the workflow that should be called. To order the jobs so that dependencies are completed before a job runs, use the needs keyword with a list of the dependencies. The secrets: inherit line ensures that secrets are passed into these workflows.
jobs:
  fetch-version:
    name: Fetch Next Version
    uses: dcgoodnow/AndroidUnityPackage/.github/workflows/tag-version.yml@main
    with:
      dryrun: true
  build-android:
    name: Build Android Plugin
    uses: dcgoodnow/AndroidUnityPackage/.github/workflows/build-android.yml@main
  publish-npm:
    name: Publish package to NPM
    needs: [build-android, fetch-version]
    uses: dcgoodnow/AndroidUnityPackage/.github/workflows/upload-package.yml@main
    secrets: inherit
    with:
      version: ${{ needs.fetch-version.outputs.tagversion }}
  tag-commit:
    name: Tag new commit
    needs: publish-npm
    uses: dcgoodnow/AndroidUnityPackage/.github/workflows/tag-version.yml@main
    secrets: inherit
    permissions:
      contents: write
If you’re testing workflows on a branch, you can change the
branchesfilter to include the branch you’re testing on, and update@{branch-name}in the workflow path to specify the branch of the workflow file to use. For example, to specify a specific branch of thebuild-androidworkflow, change theusesstatement todcgoodnow/AndroidUnityPackage/.github/workflows/build-android.yml@my-special-build-branch
Once the workflows have been committed and pushed to the main branch, the workflow should automatically run for this and every subsequent commit.
Running Workflows for Pull Requests⌗
While it’s great that the workflow now runs for every push to the main branch, it would be nice if the builds could also be done for pull requests so that changes which break the build can be caught before merged into main. This can be achieved with a few small modifications. In the tag-version.yml workflow, add the following to the inputs section:
      prerelease:
        description: "Whether or not this is a prerelease build"
        default: false
        required: false
        type: boolean
Then add the following to the env section at the end of the file:
        env:
          PRERELEASE: ${{ inputs.prerelease }}
          PRERELEASE_SUFFIX: ${{ github.head_ref || github.ref_name }}-pre
This will cause the action to add a pre-release string to the end of the version name. For example, for the branch name test-branch and latest version of 0.1.0, the version string would be v0.1.0-test-branch-pre.0. Each additional build on a given branch will increment the number after pre..
You’ll also need a new top-level workflow to execute only on pull requests. Copy the release.yml workflow and change the workflow configuration as shown:
name: PR Workflow
run-name: Building workflow for PR ${{ github.event.pull_request.title }}
on:
  pull_request:
    branches:
      - main
Last, update the fetch-version and tag-commit jobs to use the new prerelease parameter:
  fetch-version:
    name: Fetch Next Version
    uses: dcgoodnow/AndroidUnityPackage/.github/workflows/tag-version.yml@main
    with:
      dryrun: true
      prerelease: true

  ...

  tag-commit:
    name: Tag new commit
    needs: publish-npm
    uses: dcgoodnow/AndroidUnityPackage/.github/workflows/tag-version.yml@main
    secrets: inherit
    permissions:
      contents: write
    with:
      prerelease: true
This workflow will execute automatically for all opened pull requests and subsequent commits to branches with open pull requests.
Using the Published Package in Unity⌗
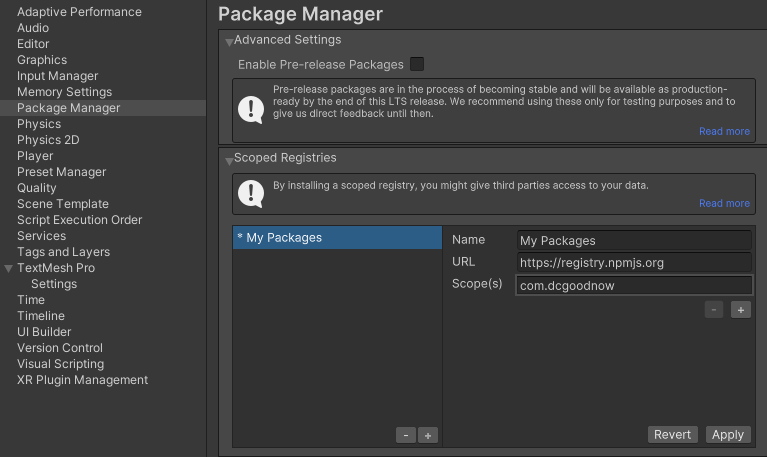
Once the package has been published, it can be referenced from the Unity Package Manager and used in projects without a local copy of the source code. First, you’ll need to add a new Package Manager scope. In the Project Settings window, navigate to the Package Manager tab. Add a new Scoped Registry, using the name of your choice and https://registry.npmjs.org as the URL. You can use the Scope(s) parameter to limit the visible packages from the specified registry. For example, I set the scope to com.dcgoodnow to only show packages from that namespace.
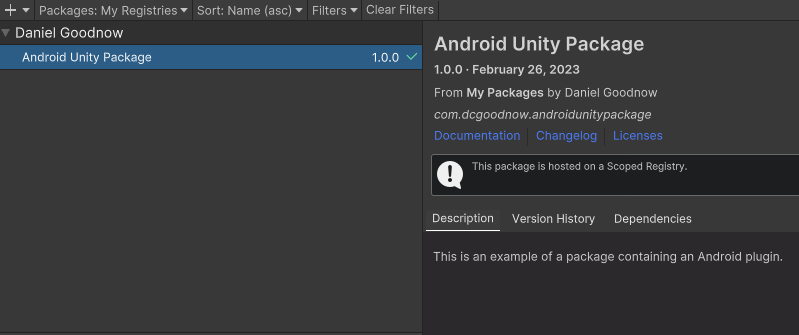
Now, you can add the uploaded package from the package manager. In the Package Manager window, change the Packages dropdown to the My Registries option (if you had previously installed the package to this project using a local path, you may need to temporarily remove the package from the project package manifest). The package should appear under your scoped registry.
Conclusion⌗
If you’ve followed along with all of the articles in this series, then at this point you should have successfully published a Unity package with an incorporated Android plugin. If you’ve encountered issues along the way, feel free to reach out to me on Twitter at @danielcgoodnow or open an issue on the repository.