Android Plugin
This post is part of a series on Android Unity Package Development. If you’re interested in following along from the beginning, I recommend you start here
Project Setup⌗
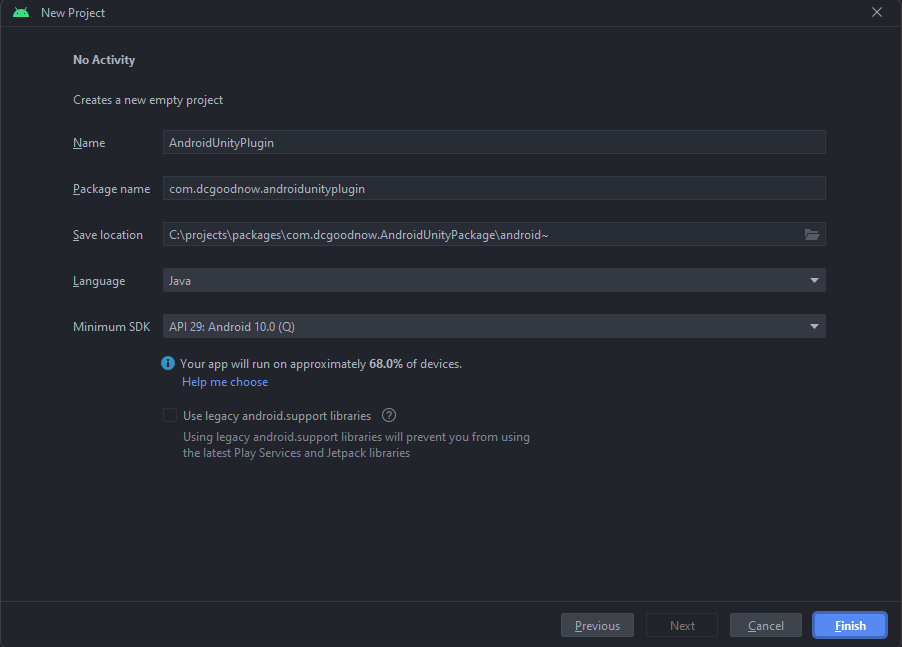
You’re now ready to create the Android plugin that will be used in the Unity package. Inside Android Studio, create a new project. Unfortunately, Android Studio doesn’t provide a library-only template for new projects, so instead choose the “No Activity” template. Set the project name and package name however you like, and configure the save location to point to the android~ directory created previously. For this example, I’m using Java for the language and API 29 as the minimum SDK version.
Once the project has loaded, you’ll need to convert the generated application to an AAR library. In the module-level build.gradle file, change the line id 'com.android.application' to id 'com.android.library' and delete the line for application.id. Sync the project (File -> Sync Project with Gradle files) to finish the conversion.
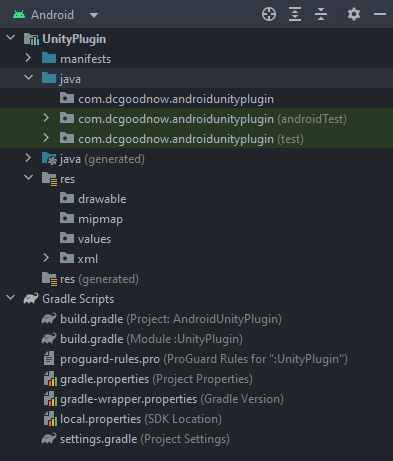
Like an APK, AAR libraries support manifests and resources. Unity will attempt to merge the manifest and resources defined in any included AAR plugins with the manifest and resources for the Unity application. This can be useful if the AAR relies on specific Android permissions or has its own resources, but can also introduce some problems due to duplicate definitions. To prevent conflicts with the resources from Unity applications, delete the application section of the manifest, as well as the resources under res/drawable, res/mipmap, res/values. Optionally, you can rename the top-level module from app to something more appropriate, like UnityPlugin.
Toaster⌗
Now, you’re ready to create a Java class for the plugin. Right-click the main package under the java folder of the module and select New -> Java class. For this example, I’ve created a simple class to show toasts.
package com.dcgoodnow.androidunityplugin;

import android.app.Activity;
import android.widget.Toast;

public class Toaster {

    private final Activity _unityActivity;

    public Toaster(Activity unityActivity)
    {
        _unityActivity = unityActivity;
    }

    public void ShowToast(String text)
    {
        Toast.makeText(_unityActivity, text, Toast.LENGTH_SHORT).show();
    }
}
The Toaster class accepts an Activity in its constructor and provides a single method to show a string of text in a Toast. Many operations within Android rely on a Context object, which is a superclass of Activity. Injecting the Unity activity into an Android plugin object is a common occurrence that will be shown in detail in the next article.
Building⌗
At this point, you can build an AAR library to use in Unity. Before you do that, you should update the build process to automatically copy the built library to the appropriate Unity plugins directory. Add the following to the end of the module-level build.gradle:
def pluginsFolder = [project.rootDir, '..', 'Plugins', 'Android'].join(File.separator)

task cleanPlugins(type: Delete) {
    delete fileTree(pluginsFolder) { includes = ['*.aar', '*.aar.meta'] }
}

task copyOutputRelease (type: Copy, dependsOn: cleanPlugins) {
    from    ( [buildDir.absolutePath, 'outputs', 'aar'].join(File.separator) )
    include ( "*-release.aar" )
    into (pluginsFolder)
}

task copyOutputDebug (type: Copy, dependsOn: cleanPlugins) {
    from    ( [buildDir.absolutePath, 'outputs', 'aar'].join(File.separator) )
    include ( "*-debug.aar" )
    into (pluginsFolder)
}

afterEvaluate {
    assembleDebug.finalizedBy(copyOutputDebug)
    assembleRelease.finalizedBy(copyOutputRelease)
}
This snippet does a few things:
- Defines a
pluginsFoldervariable that will be used in the following tasks - Creates a
cleanPluginstask that will remove any AAR files in the plugins folder. Deleting all AAR files before copying the built output ensures that only one variant of the AAR will be present in the folder, preventing conflicts in Unity. - Creates
copyOutputDebugandcopyOutputReleasetasks which will copy the respective build outputs to the plugins folder. These tasks will automatically callcleanPluginsbefore being run. - Modifies the
assembleDebugandassembleReleasetasks to run the respective copy tasks after the assemble task completes.
You can now build the project, but the next step requires a release variant of the plugin. Change the build variant to release (Build -> Select Build Variant) and build the project (Build -> Make Project). After the build completes, the bundled AAR should be placed in the Plugins/Android directory of the package.
In the next article, I’ll show how to incorporate the plugin into a Unity package.